Theme Setup and Install – Giga Store
1. Install & Activate the Theme
2. Install & Activate Required and Recomended Plugins
After the theme is activated, a notice will appear to install the recommended plugins. Install and activate them by selecting ‘Begin installing plugins’.
Be sure that you both “Install” and “Activate” the plugins in order to make them functional.
Required plugins:
- WooCommerce
- Kirki Toolkit
- Giga Store Advanced Sections (only in free version) – Download Here
Recomended plugins:
- Contact Form 7
- YITH WooCommerce Wishlist (PRO version)
- YITH WooCommerce Compare (PRO version)
- YITH WooCommerce Quick View (PRO version)
- Mailpoet Newsletters (PRO version)
Install and activate all required plugins. installing these plugins is essential for the functionality of WooCommerce Store! (You dont need Giga Store Advanced Sections plugin in PRO version. These sections are included in PRO version)
We Recommended Switch “Front page displays” to “A static page”
If you want to create homepage like in our demos with the blog posts page, create the new page first, set the template “Homepage” and create new page (blank page for blog posts). Then please go to Customize -> Static Front Page and switch “Front page displays” to “A static page” and select the page you created before and set the bog page. – Tutorial
3. Add the content
If you dont have any products, you can use the WooCommerce Dummy Data content
PRO version includes One click demo import
4. Setup the theme
- Setup the menu
- Add logo
- Setup the homepage blocks (you can disable them)
- Setup the widgets
Homepage Setup
When the theme is first installed, the demo mode would be turned on. This will display some sample/example content to show you how the website can be possibly set up. We recommended to switch to a static front page.
To setup the homepage go to Customizer – Homepage Settings – Homepage Layout
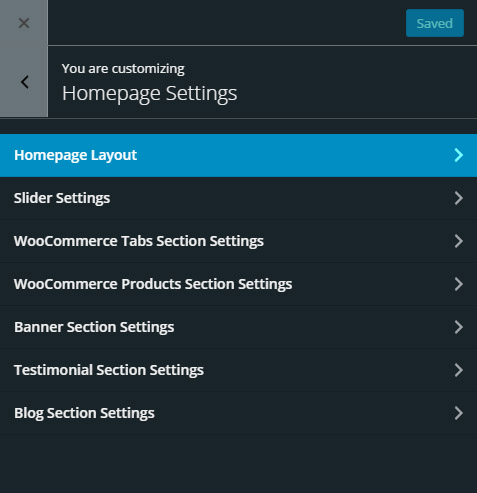

You can enable or disable the slider and homepage blocks. By drag and drop you can set the block positions on homepage.
Hit back button and setup the blocks one by one…
Giga Store PRO includes all free sections and:
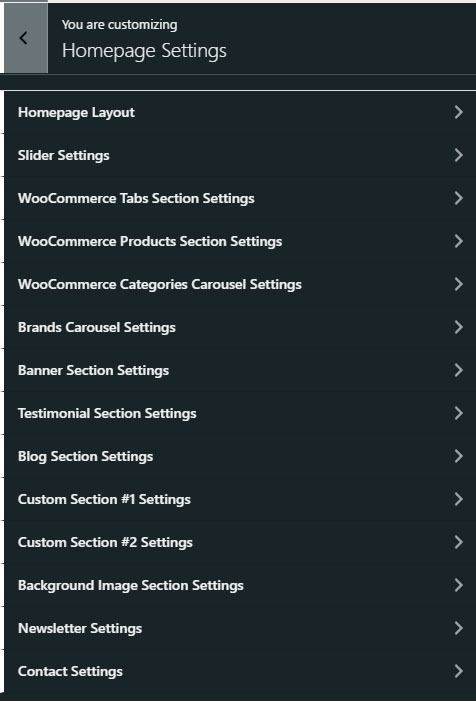
Included in Giga Store PRO:
- All free sections
- WooCommerce Categories Carousel
- Brands Carousel
- Contact section
- Custom Section #1, #2
- Newsletter section
- Background Image section
Slider
Go to Customizer – Homepage Settings – Slider Settings and setup the slider
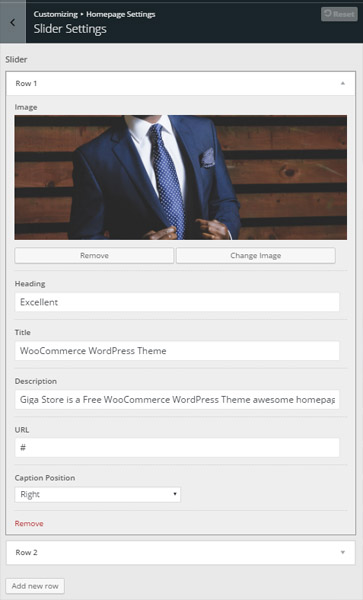

- Upload the image
- Set the Heading/Title/Description/URL
- Define the caption position
- Hit the “Add new row” to add new slider image
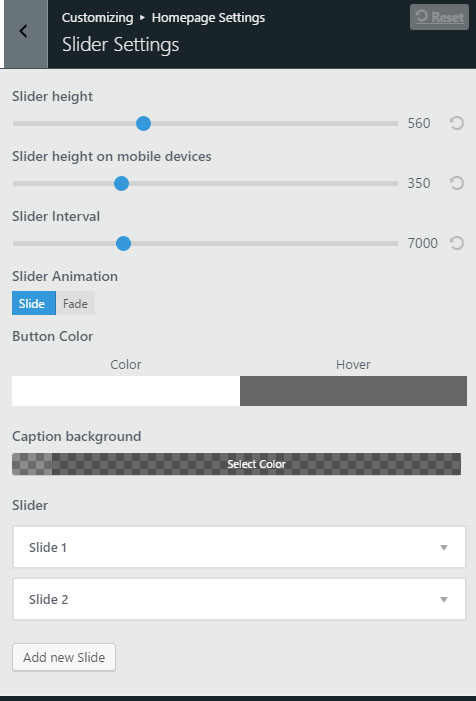
Slider Giga Store PRO includes:
- Slider height option
- Slider height on mobile devices option
- Slider interval option
- Slider animation option
- Button colors options
- Caption background option
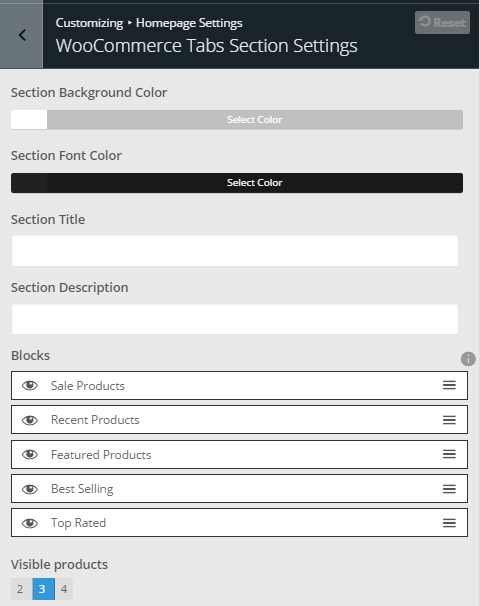
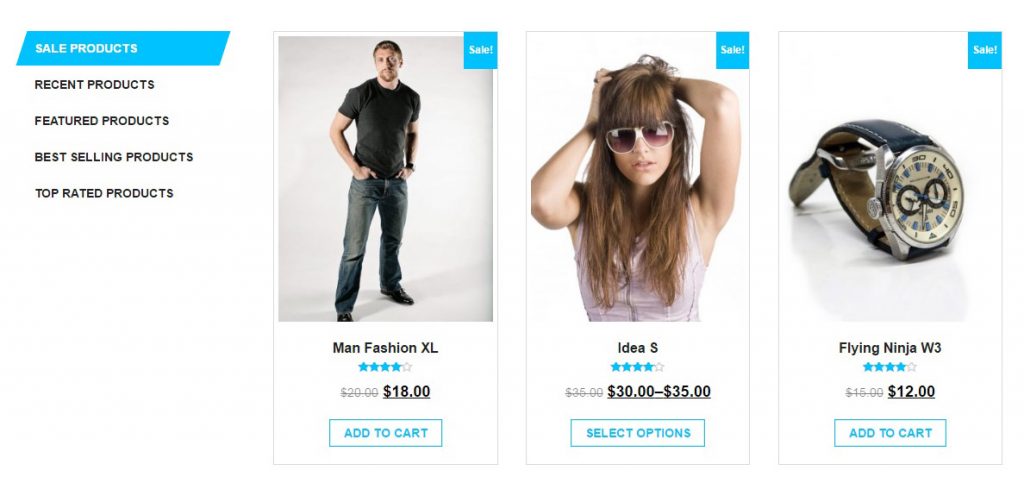
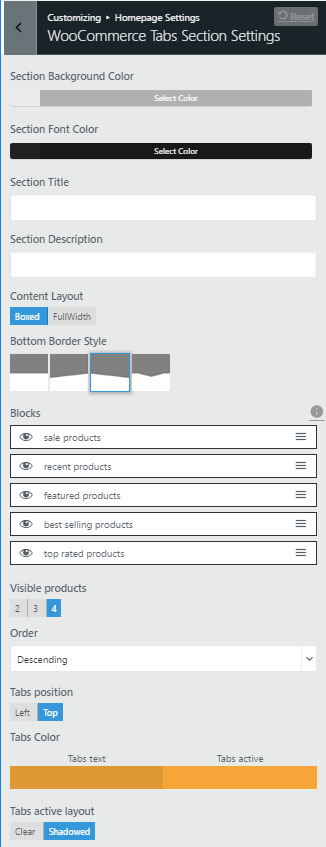
WooCommerce Tabs Section
Go to Customizer – Homepage Settings – WooCommerce Tabs Section Settings
Tabs Giga Store PRO includes:
- Setup the section background and font color
- Add title and/or description (if you need them)
- Enable (hit the eye) and set the position (by drag and drop) the tabs – first tab is always visible
- Set the Visible products – products per row
Tabs Giga Store PRO includes:
- Contend Layout option – Boxed/Fullwidth
- Bottom border style option
- Products order
- Tabs position – left or top
- Tabs color option
- Tabs active layout
WooCommerce Products Section
Go to Customizer – Homepage Settings – WooCommerce Products Section Settings
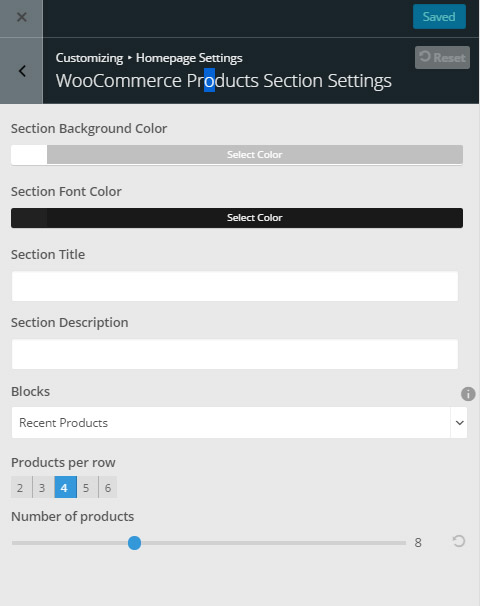

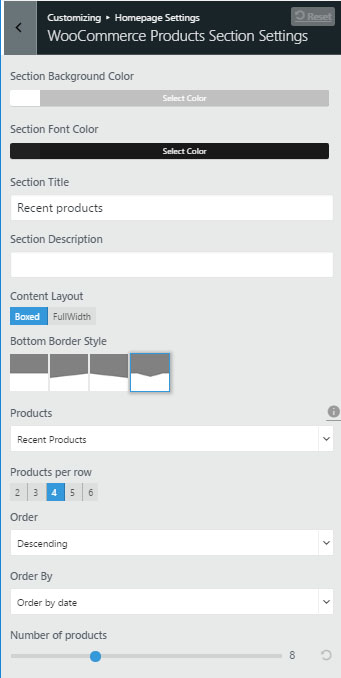
- Setup the section background and font color
- Add title and/or description (if you need them)
- Select the type of products
- Set the Visible products – products per row
- Set the number of visible products
Giga Store PRO includes:
- Order (ASC, DESC)
- Order by (No order, Order by post ID, Order by title, Order by date, Random order)
Banner Section
Go to Customizer – Homepage Settings – Banner Section Settings
This section add custom banner with text, image and button.
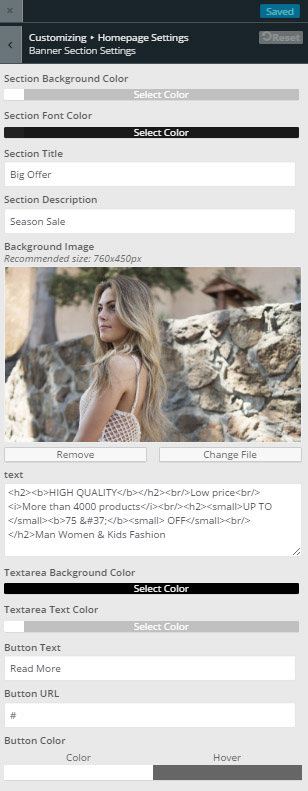
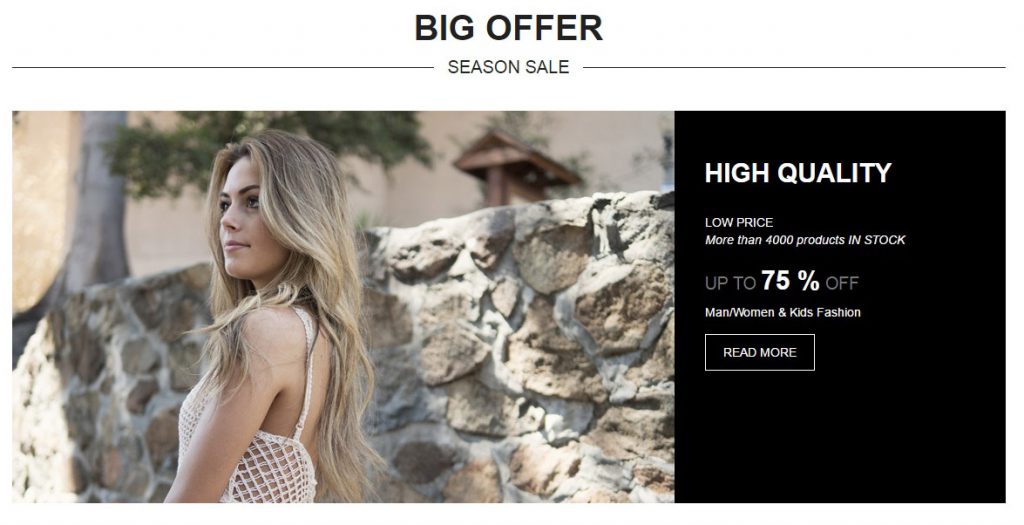
- Setup the section background and font color
- Add title and/or description (if you need them)
- Upload or select the image (use the recommened size)
- Add your custom text – format HTML
- Set the colors and button
Giga Store PRO includes:
- Content layout – boxed/fullwidth
- Bottom border style
Testimonial Section
Go to Customizer – Homepage Settings – Testimonial Section Settings
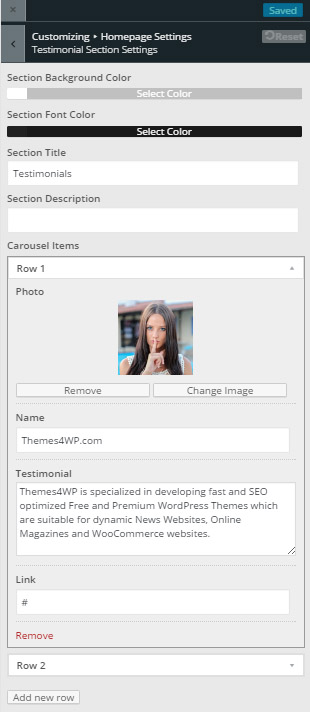
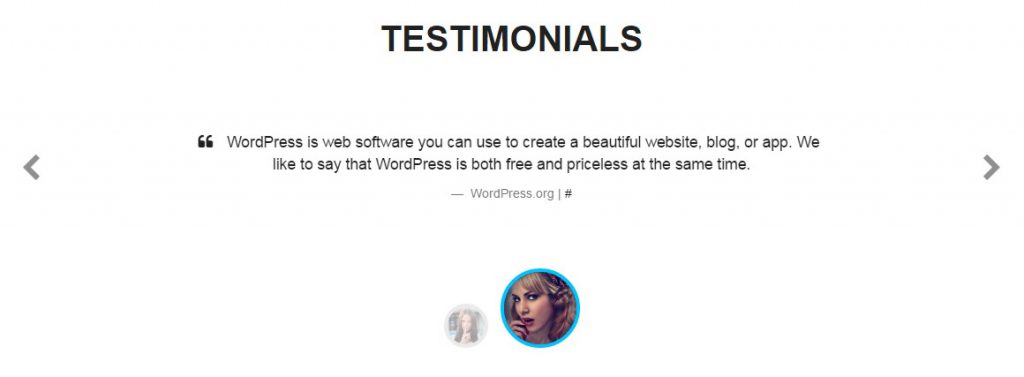
- Setup the section background and font color
- Add title and/or description (if you need them)
- Add new row – testimonial
- Upload/select the image, setup the name, testimoial and link
- Hit the “Add new row” to add new testimonial
Giga Store PRO includes
- Content layout – boxed/fullwidth
- Bottom border style
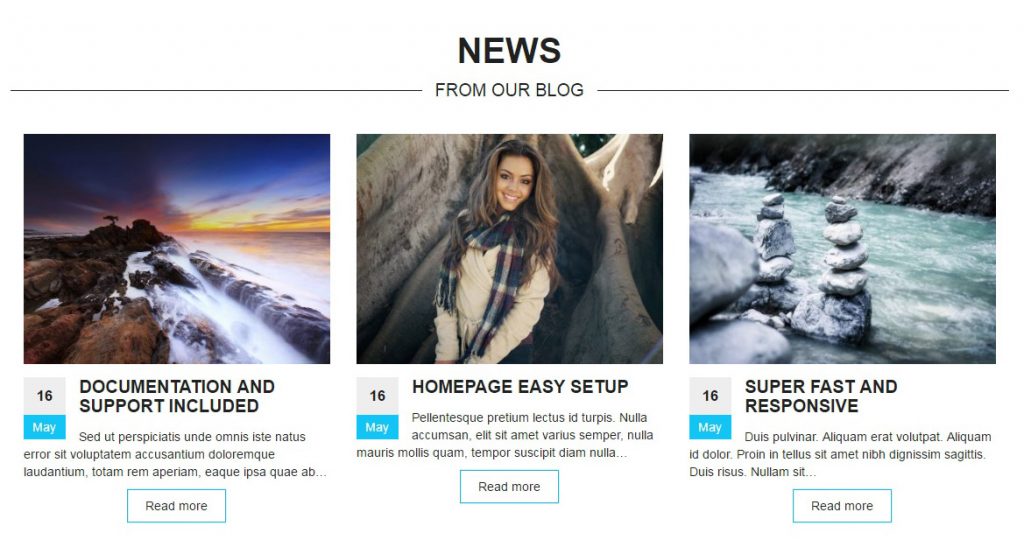
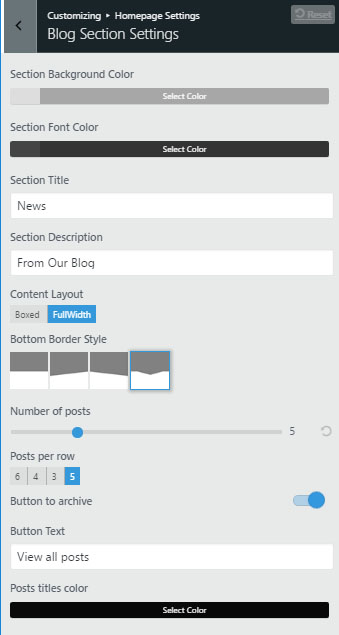
Blog Section
Go to Customizer – Homepage Settings – Blog Section Settings
This section dislay the lates posts
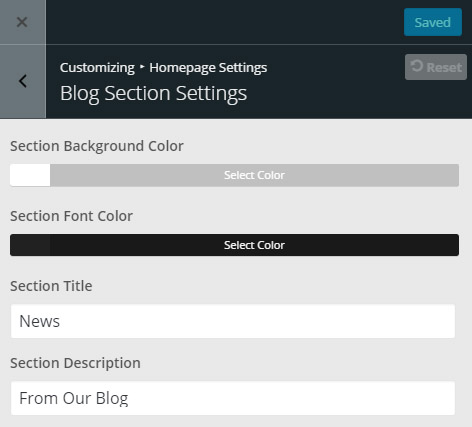
Giga Store PRO
- Setup the section background and font color
- Add title and/or description (if you need them)
Giga Store PRO includes
- Content layout – boxed/fullwidth
- Bottom border style
- Number of displayed posts
- Posts per row
- Button to archive option with custom text
- Titles color
WooCommerce Categories Section (PRO version only)
Go to Customizer – Homepage Settings – WooCommerce Categories Carousel Settings
This section dislay product categories in carousel
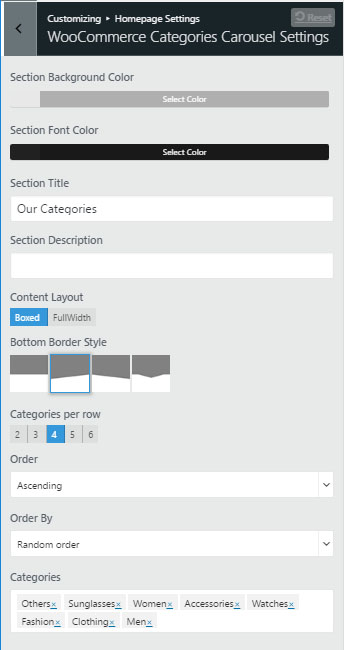
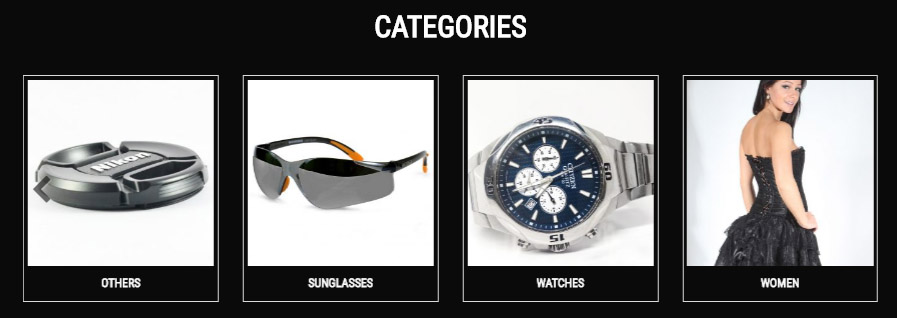
- Setup the section background and font color
- Add title and/or description (if you need them)
- Set the laoyut and border style
- Set the number of visible categories
- Set the order
- Set the order by
- Set the number of products
- Add categories you want to display!
Brands Carousel Section (PRO version only)
Go to Customizer – Homepage Settings – Brands Carousel Section Settings
This section dislay brands/images in carousel


- Setup the section background and font color
- Add title and/or description (if you need them)
- Set the layout and border
- Hit the button – Add new Brand
- Upload/select the image – you can setup the title, description and link too
- Hit the “Add new Brand” to add new brand/image in carousel
- Set the visible items per row
Contact Section (PRO version only)
Go to Customizer – Homepage Settings – Contact Settings
The plugin Contact Form 7 must be installed and activated!
It’s important that you create a new contact form after you install theme. This will allow it to create the contact form with properly formatted HTML. Click on Contact in your sidebar after installing Contact Form 7. Next click add new to create a new contact form. You probably won’t need to change anything on this page, so just give your contact form a title, and then click save.
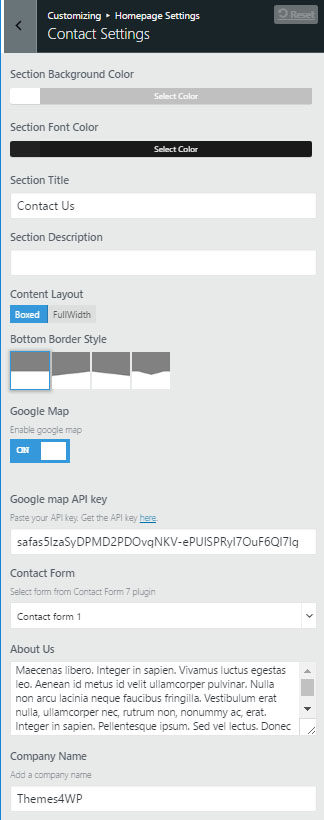
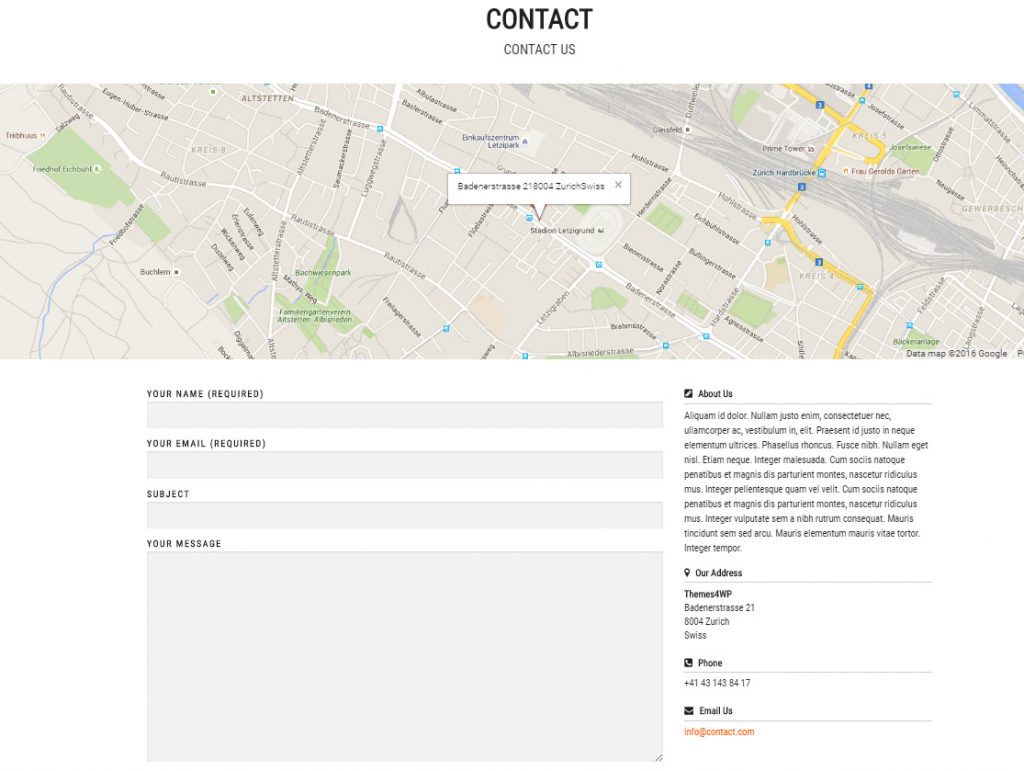
Google Maps just recently made changes related to the use of Google Maps. Effective June 22nd, Google will no longer support keyless access (so that is any request that does not include an API key)! Users can request an API key here
- Go to Customizer > Homepage Settings > Contact Settings
- Setup the section background and font color
- Set the title and description
- Set the content layout and border style (PRO feature only)
- Enable or disable the google map (put your api key) (PRO feature only)
- Select the contact form you want to display
- Add “About Us” description
- Add Company name
- Add Address – this address will be used in Google Map above (Google map is PRO feature only)
- Add your telephone number
- Add your email
Custom Page Section Setup (PRO version only)
In this section you can display any page content on your homepage. Make some page first with your content, you can use some shortcodes generators,…
- Go to Customizer > Homepage Settings > Custom Section #.. Settings
- Setup the section background and font color
- Set the title and description
- Select the page content
Newsletter Section (PRO version only)
Go to Customizer – Homepage Settings – Newsletter Settings
The plugin Mailpoet Newsletters must be installed and activated!
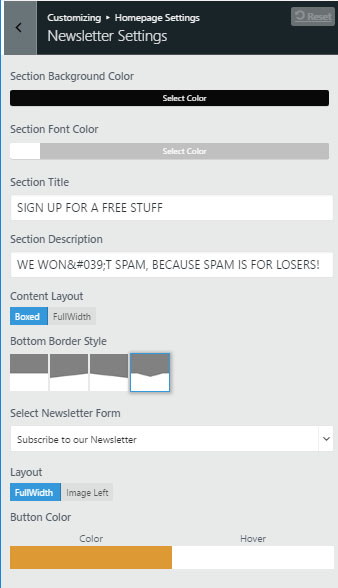

- Go to Customizer > Homepage Settings > Newsletter Settings
- Setup the section background and font color
- Set the title and description
- Set the content layout and border style
- Select the form you want to display
- Set the layout (if you set “Image Left” – image upload option will appear)
- Set the button color
To setup the form navigate to WordPress dashboard → MailPoet → Settings → Forms and edit or create new form. You can add this form as widget in widget area too.
Background Image Section (PRO version only)
Go to Customizer – Homepage Settings – Background Image Section Settings
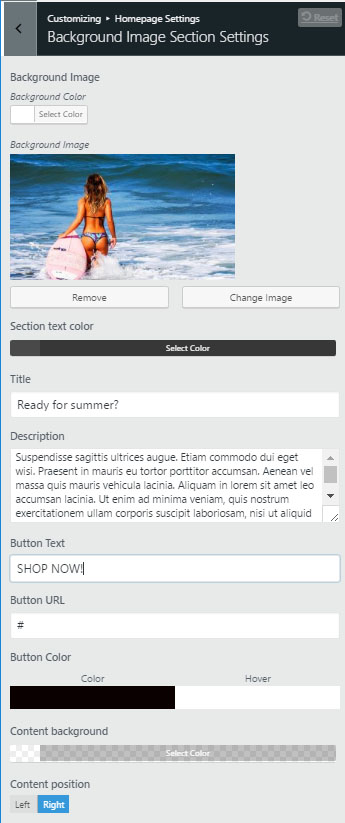
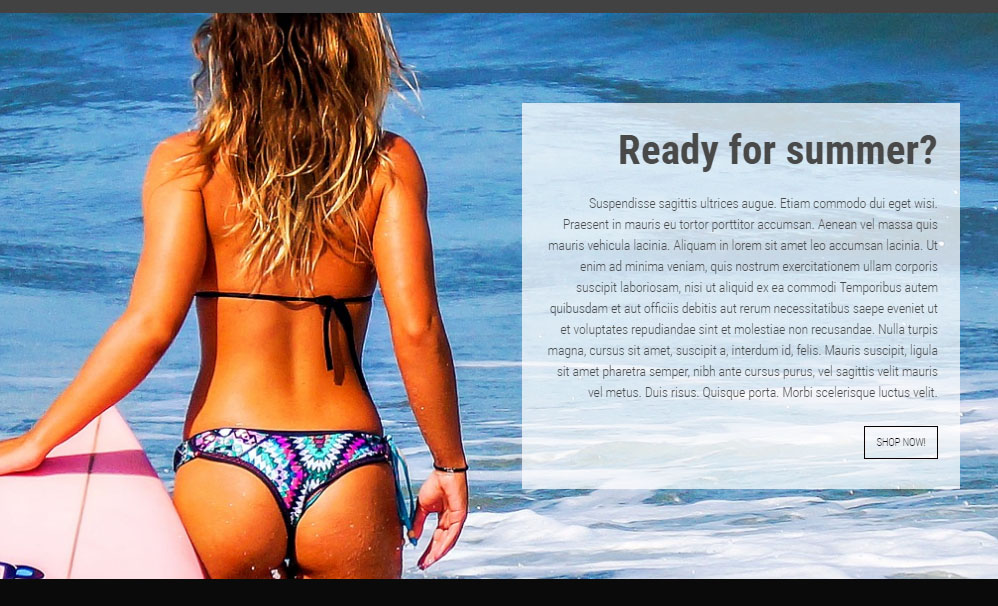
- Go to Customizer > Homepage Settings > Background Image Section Settings
- Setup the section background
- Upload the backgroun image
- Set the color of the text
- Put the title, description, button texts and button URL
- Set the colors
- Set the content position